Stitch · Finishing · Some experience
Mattress stitch: the seam that disappears
Most hand-knitted garments are seamed, and most seaming problems come from picking up too deep or pulling too tight. Mattress stitch, worked one half-stitch in from the edge, produces a seam that is genuinely invisible from the right side and has the same stretch as the fabric around it.
Published Abbreviation mattress
- -purl
- Vknit
At a glance
- Symbol-
- Abbreviationmattress
- TypeStitch
- FamilyFinishing
- LevelSome experience
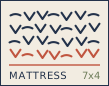
Working chart
| Step | Round / row | Stitches |
|---|---|---|
| Block both pieces before seaming Seaming an unblocked piece locks in whatever shape it dried in. | - | - |
| Thread a blunt tapestry needle with a 60 cm length Longer than 80 cm and the yarn abrades as it passes through. | 1 | - |
| Take a half-stitch under the bar between the edge stitch and the next one Then the same bar on the other piece, alternating sides. | 2 | 1 |
| Pull snug every 5 cm, not every stitch Tension the seam in sections so it does not pucker. | 3 | 5 |
| Work a 2 cm test seam on a swatch first If the seam puckers, you are picking up too deep. | 4 | 2 |
Measurements
| Seam stitch depth | Yarn per 10 cm of seam | Seam width |
|---|---|---|
| 1 stitch in | 2.0 m | 2 rows |
| 1.5 stitches in | 2.2 m | 2 rows |
| Edge stitch only | 1.6 m | 3 rows |
| Garter fabric | 2.6 m | 3 rows |
Yarn and yardage
| Fabric | Ratio of yarn to seam length | Visibility |
|---|---|---|
| Stocking stitch, 22 sts / 10 cm | 3.0x | invisible |
| Stocking stitch, 16 sts / 10 cm | 2.6x | faint |
| Garter stitch | 3.4x | hidden in texture |
| Ribbing, seamed open | 3.2x | visible if mismatched |
What you are actually doing
Mattress stitch joins two edges row for row, not stitch for stitch. You pick up the horizontal bar between the edge stitch and the second stitch on the front piece, then the matching bar on the back piece, alternating sides and pulling the seam closed as you go.
Because each pass catches a half-stitch on each side, the two edges roll together and the seam sits behind them. The result is a join that reads as a single column of stitches from the front.
Depth and tension
Go one half-stitch in from the edge. Deeper than that and the seam ridge becomes visible on the right side; shallower and the edges curl out. On a 22 stitches per 10 cm fabric the picked-up bar is about 2 mm from the edge.
Do not pull tight after every stitch. Work five or six passes, then snug the yarn in one movement along the length. Seams that pucker are almost always over-tensioned rather than incorrectly picked up.
Row for row, not stitch for stitch
When seaming a side seam, match one row of the front piece to one row of the back piece. If the two pieces have different row gauges - common when one was knitted flat and the other in the round - match the lengths rather than the row counts, easing the longer piece in as you go.
The seam should measure the same as the pieces when laid flat and relaxed. If it is 5 mm short over 30 cm, you have been pulling too hard; if it is 5 mm long, the pieces will flare.
Blocking before and after
Block the pieces flat before seaming. Unblocked stocking stitch curls, and a seam worked into a curled edge sets the curl permanently.
After seaming, press the seam lightly from the wrong side with a damp cloth, or steam it and let it cool before moving the piece. This settles the seam without flattening the fabric on either side of it, and it is the step that makes the difference between a seam you cannot find and a seam you can.