Stitch · Finishing · Confident knitter
Three-needle bind-off: joining two live edges without sewing
Shoulder seams, hat crowns and toe closures all need two live edges joined. The three-needle bind-off does it with a third needle in a few minutes, produces a seam one stitch thick, and needs no tapestry needle at all.
Published Abbreviation 3-needle BO
- ^decrease
- Vknit
At a glance
- Symbol∧
- Abbreviation3-needle BO
- TypeStitch
- FamilyFinishing
- LevelConfident knitter
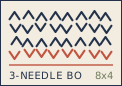
Working chart
| Step | Round / row | Stitches |
|---|---|---|
| Place the two live edges on separate needles, right sides together Both pieces must have the same number of live stitches. | - | 96 |
| Insert a third needle knitwise into the first stitch of both needles Work the two stitches together as one. | 1 | 95 |
| Repeat with the next pair, then pass the first stitch over the second Exactly a standard bind-off, but consuming two stitches at a time. | 2 | 94 |
| Continue to the end and fasten off the last stitch The seam is one stitch thick and has no ridge on either side. | 96 | 0 |
| Compare with a mattress-stitch seam The three-needle join is about 1.5 mm thinner and takes a third of the time. | - | 0 |
Measurements
| Needle (mm) | Seam thickness | Stretch retained |
|---|---|---|
| 3.25 | 1 stitch | 85% |
| 4.00 | 1 stitch | 85% |
| 4.50 | 1 stitch | 85% |
| 5.50 | 1 stitch | 85% |
Yarn and yardage
| Join length | Yarn needed | Time saved vs seaming |
|---|---|---|
| 10 cm | 1.2 m | 6 min |
| 20 cm | 2.4 m | 12 min |
| 30 cm | 3.6 m | 18 min |
| 40 cm | 4.8 m | 24 min |
The setup
Put the two pieces to be joined on two separate needles, right sides facing each other. Both edges must carry the same number of live stitches; if one has more, decrease the excess evenly across the row before starting.
Hold the two needles parallel in your left hand and work with a third needle in your right. The working yarn should come from the back piece.
Working the join
Insert the right needle knitwise into the first stitch on the front needle and then into the first stitch on the back needle, and knit the two together as one stitch. Do the same with the next pair, so you now have two stitches on the right needle.
Pass the first stitch over the second and off the needle, exactly as in a standard bind-off. Repeat to the end of the row. The result is a chain of stitches running along the join, with the two edges interlocked.
Where it belongs
Shoulder seams on garments knitted flat get the neatest result, because the seam sits inside the shoulder and the chain looks like a deliberate design line if it shows at all. Hat crowns worked as a folded rectangle, sock toes on a cuff-down sock, and the base of a knitted bag all use the same technique.
It is not right for a seam that has to stretch sideways, because the chain has very little give along its length. For a side seam on a fitted garment, mattress stitch is the better choice.
Getting the tension even
The join is only as good as its tension. Work it loosely - about one needle size looser than your knitting - because the chain cannot be adjusted afterwards. If it comes out tight, the joined edges pucker and no amount of blocking will fix it.
For a shoulder that must not stretch, work the bind-off on a needle two sizes smaller and pull each stitch snug. For a toe that must stretch, keep the working yarn loose and leave a 15 cm tail for closing any remaining gap.